
Before proceeding further you must have a working version of Prestashop already installedon your domain, we will call it prestashop store.
For more details information Prestashop platform, you must visit prestashop installation documentation atleast once http://doc.prestashop.com/display/PS17/Getting+started
-
To install the Prestashop you must have Server space at a Hosting Provider, Domain Name for your site, FTP Client to access your files, File Editor.
- Web server: Apache Web server 2.0 or later.
- PHP 7.2 or later.
- MySQL 5.1 or later.
- At least 1024 Mb of RAM on your server.
-
Or you can also install it on your localhost server.
-
After Prestashop is installed Follow below steps to install our module.
There is a two way you can install the module to your prestashop store.
Let see how we can install the module both the way step by step.
Take quick guide from our video tutorials, after that you can follow the steps below.
First of all login to your store back office using correct credentials. After successful login below screen will be displayed.
Follow the screen and GOTO Back office > Modules > Module Managers > Click Upload module

After that one dialog box asking Drop your module archive here or select file simply Drag the module zip or you click on select file, It will ask you to browse the module zip from your computer.

Now Drag the module it will automatically start start installing module. So now stay calm and wait for success message.
Or
If you click on Select file follow screen for installing module.
Once browse the module zip and the module installation will start automatically. Please wait for successful message.
If installation is successfull it will show successful message as below screen.
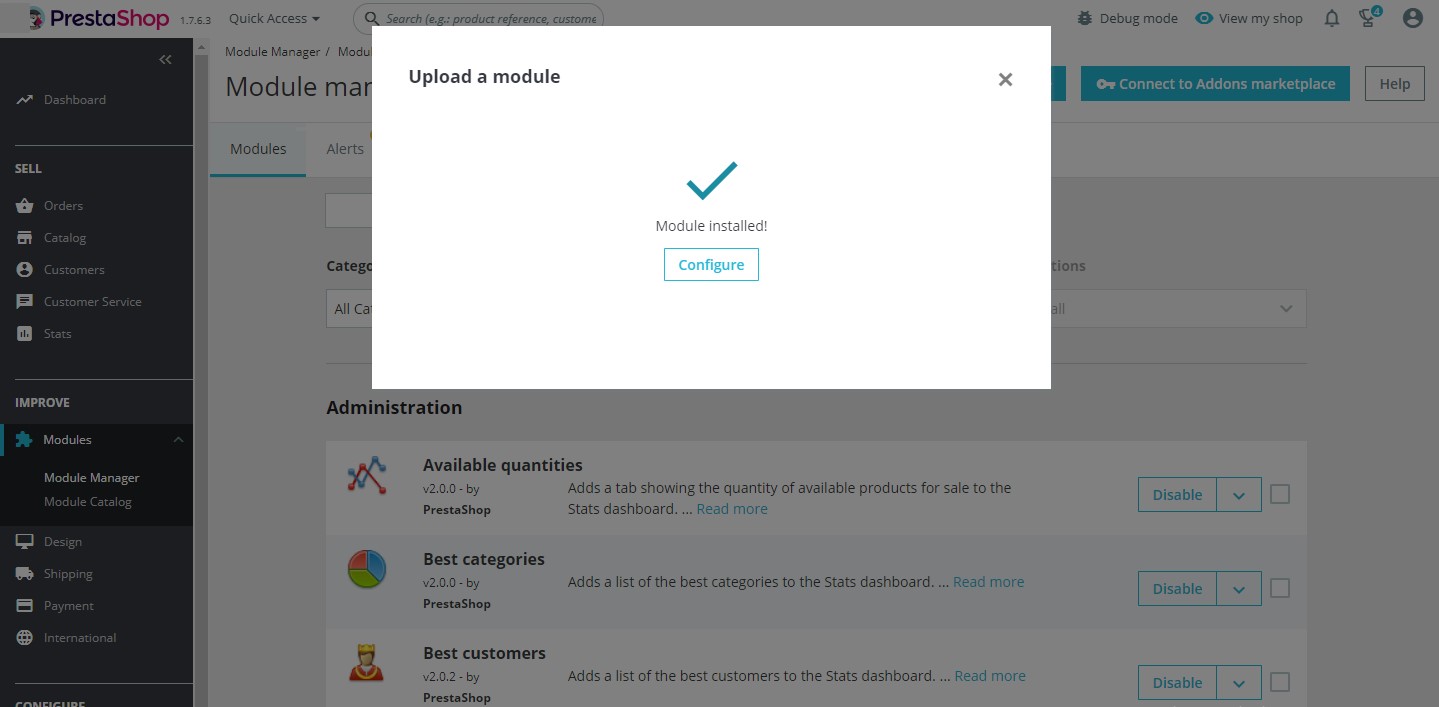
If module installation display success message, Please click on Configure Button and follow Step 3 Module configuration.
If any error after waiting for installing the module, please Contact us at time just create Ticket, Our technical team will Contact back within 24 hours or as soon as possible. And will be our pleasure to help.
Take quick guide from our video tutorials, after that you can follow the steps below.
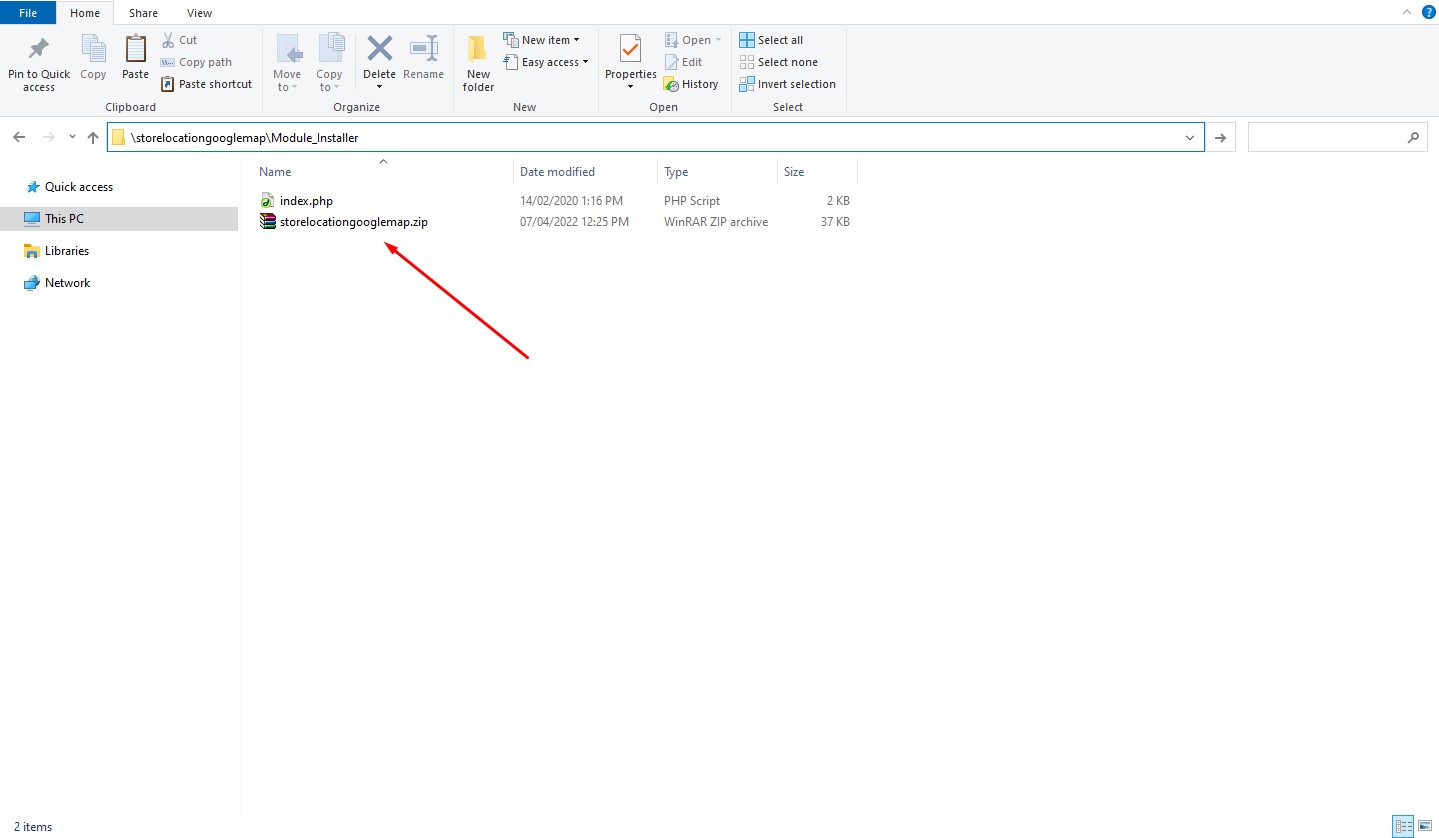
While installing module via FTP server, At very First step login to FTP server and connect it via any cross-platform FTP applications(ie. FileZila or Cute FTP). In this documentation we are using File Zilla FTP Application software.
After that goto to the path modules directory in prestashop store installation(ie. /yourstore/modules). As below screen.
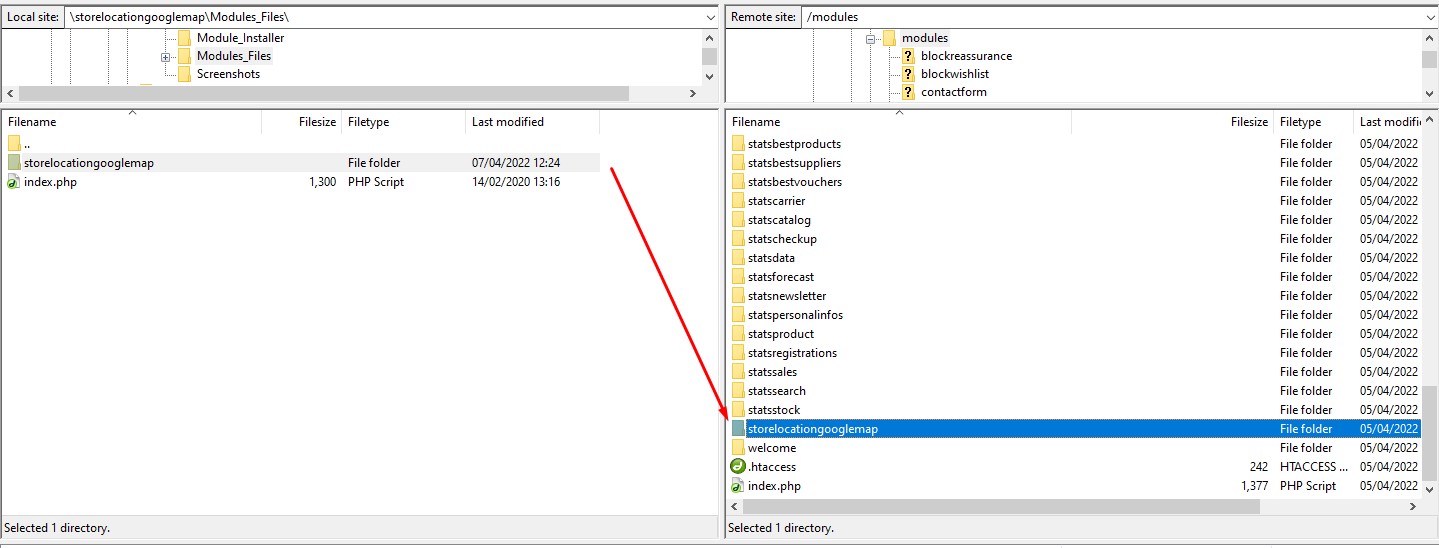
Simple Copy module directory to the path mentioned above and follow the screen.
After successfully copying file simply goto Backoffice > Modules > Module Catalog. And browser module adding text "Store map" to search box. As shown in below screen.
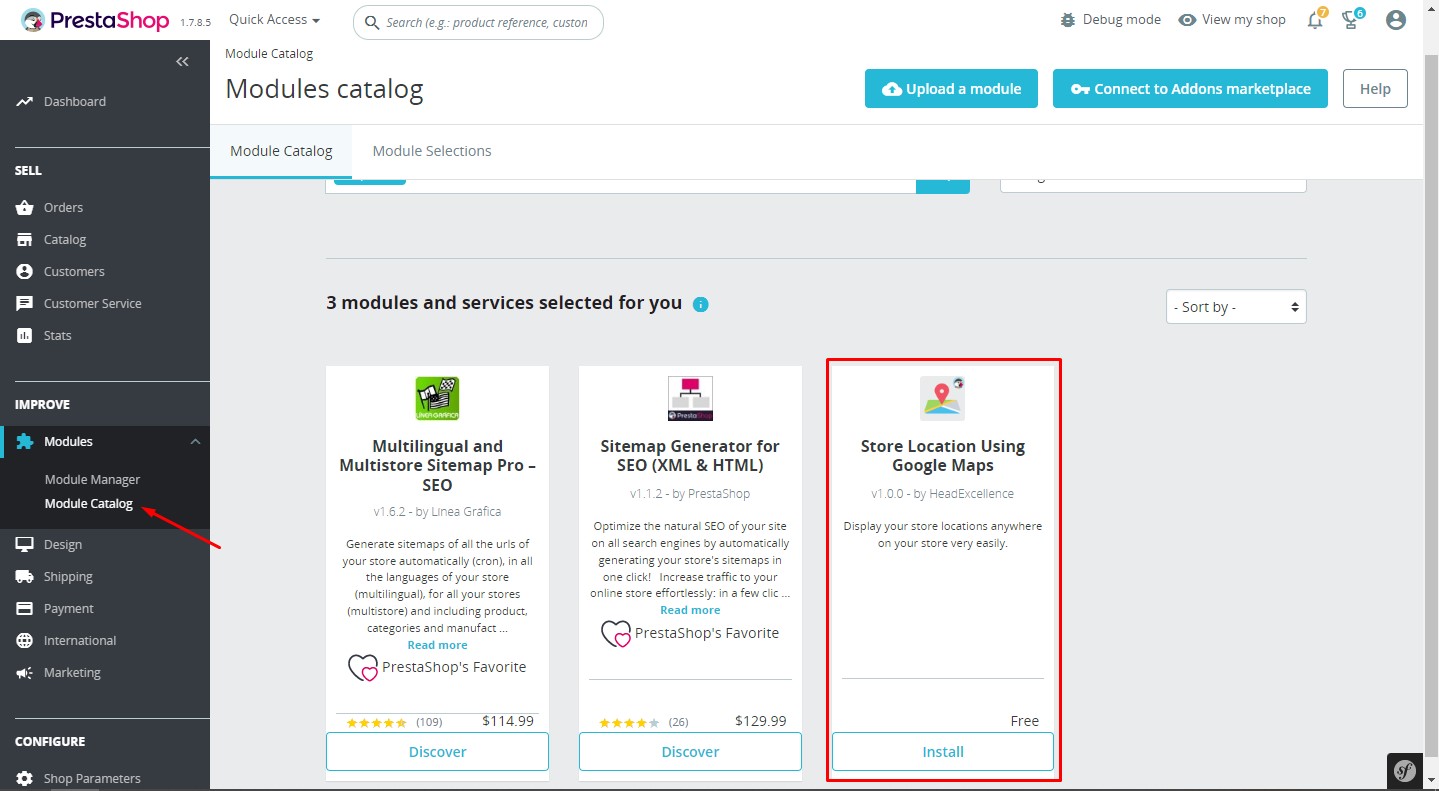
Click on Install Button after that module installation will be automatically started. Please wait for successful message.

If module installation displays success message, Please click on Configure Button.
As mentioned in above steps after successful installation of module, Let cofigure the module. Configuration part has three section as below.
Module configuration is a primary step and it includes connection to google Account which is authorised to create Maps API. Above key is dummy and you must replace with correct key.
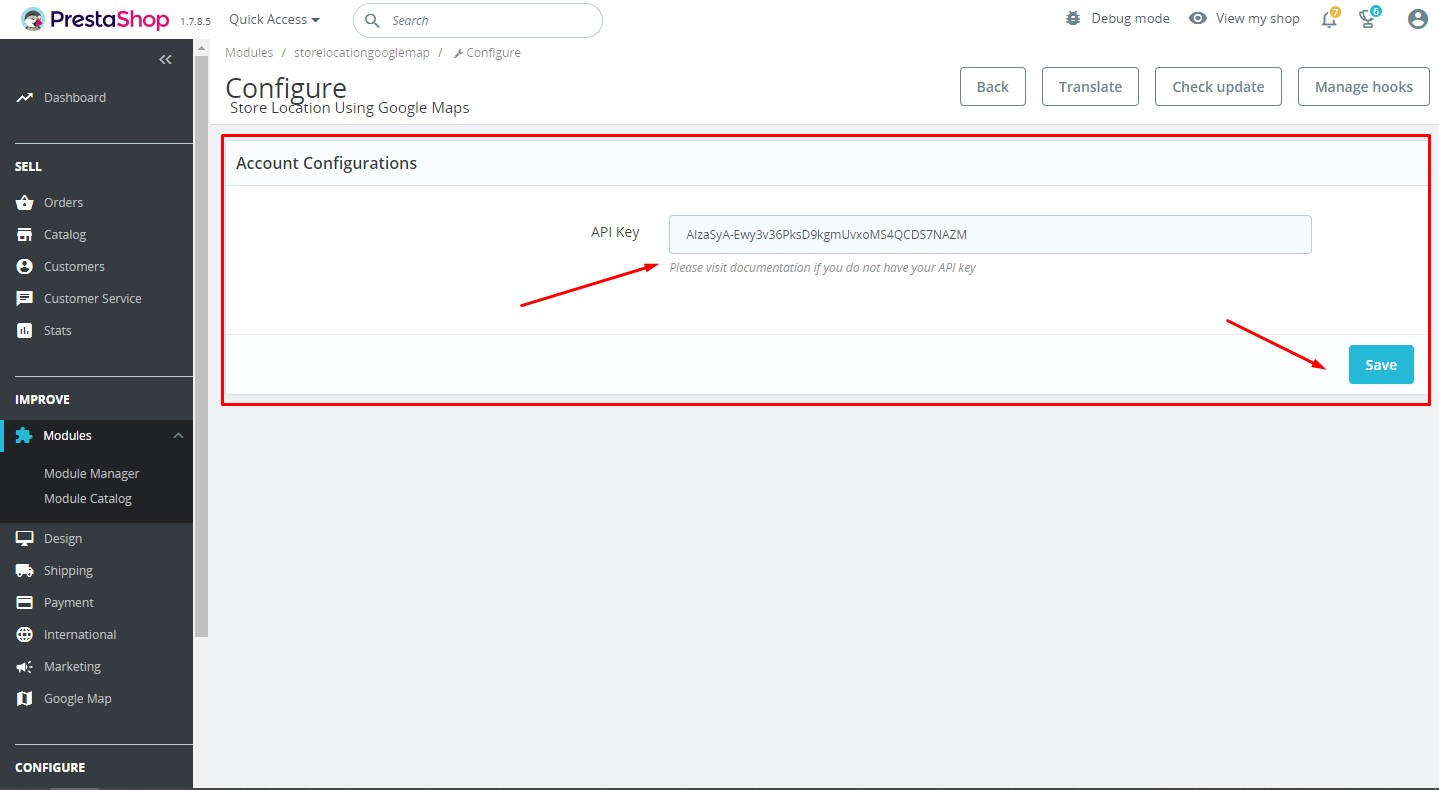
Let understand all settings.
-
API Key :Without API key store map module will not work, So get your Api key from google
This module has created map block at store home page, you can manage that block with help of this step, for that follow steps in below screen.
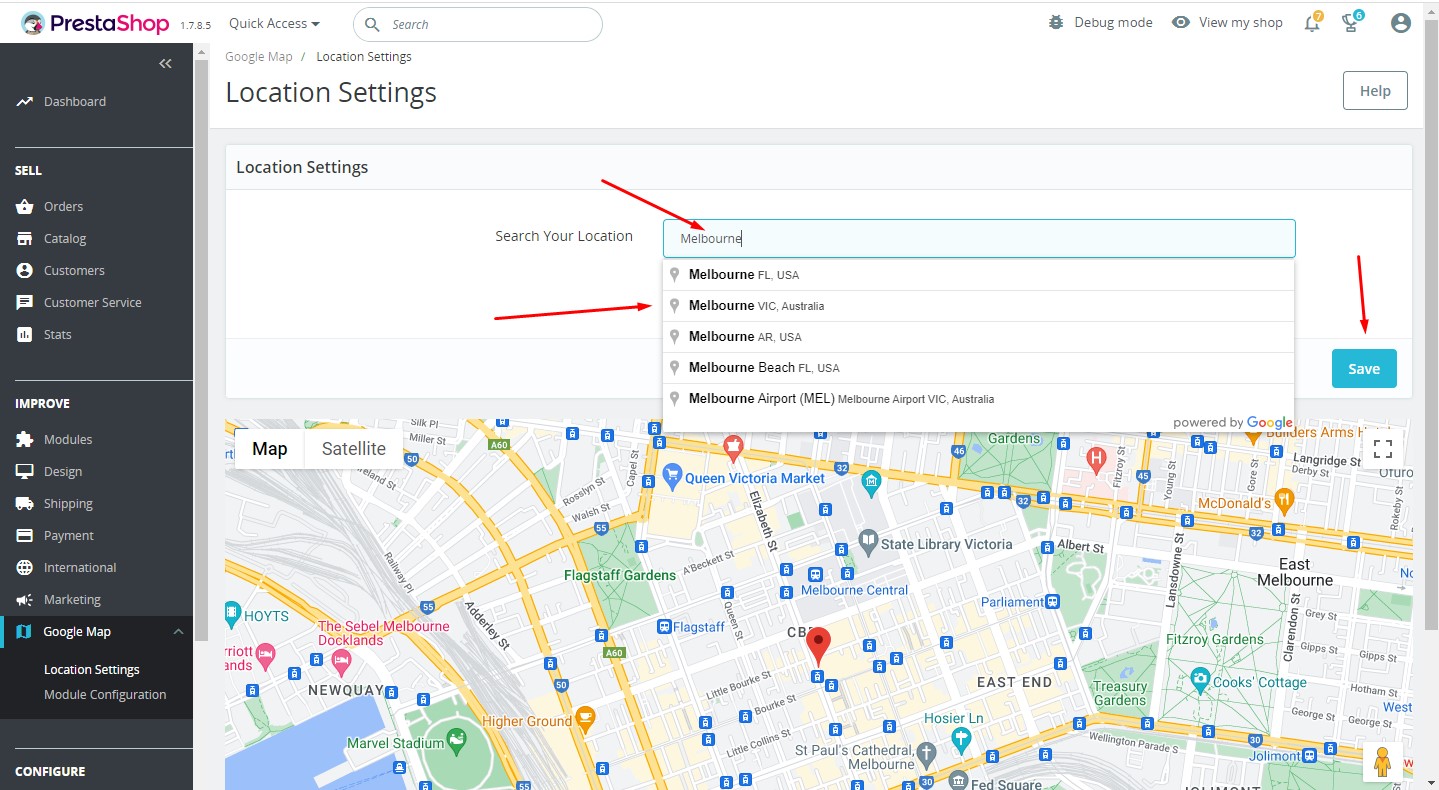
Let understand all settings.
-
Search your location/address : Please type the location/address title registered with to google map. for example type Melbourne it will list all related places, select it and save the module configurations.
Watch a video OR Follow steps below
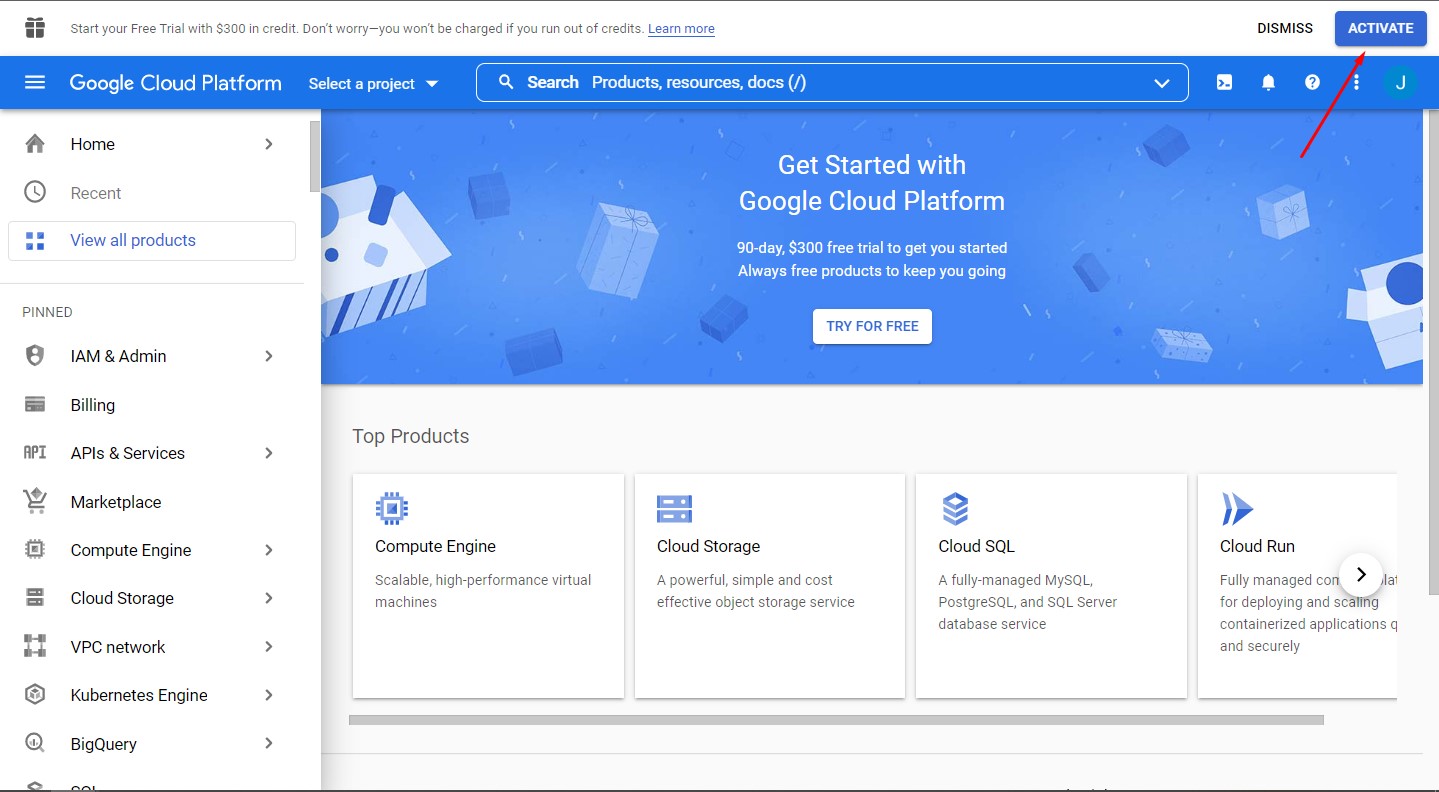
First of all visit https://console.cloud.google.com/ to start creating APIs.

- 1. Please create google account if you do not already have atleast one, Once you login to google account you will see google console home page as below.
- 2. Google APIs are free to use, but now it is not, so we need to activate our google account to access google APIs.
- 3. click on Activate button, and follow the steps by adding your billing account details. please note it is required to use google APIs.
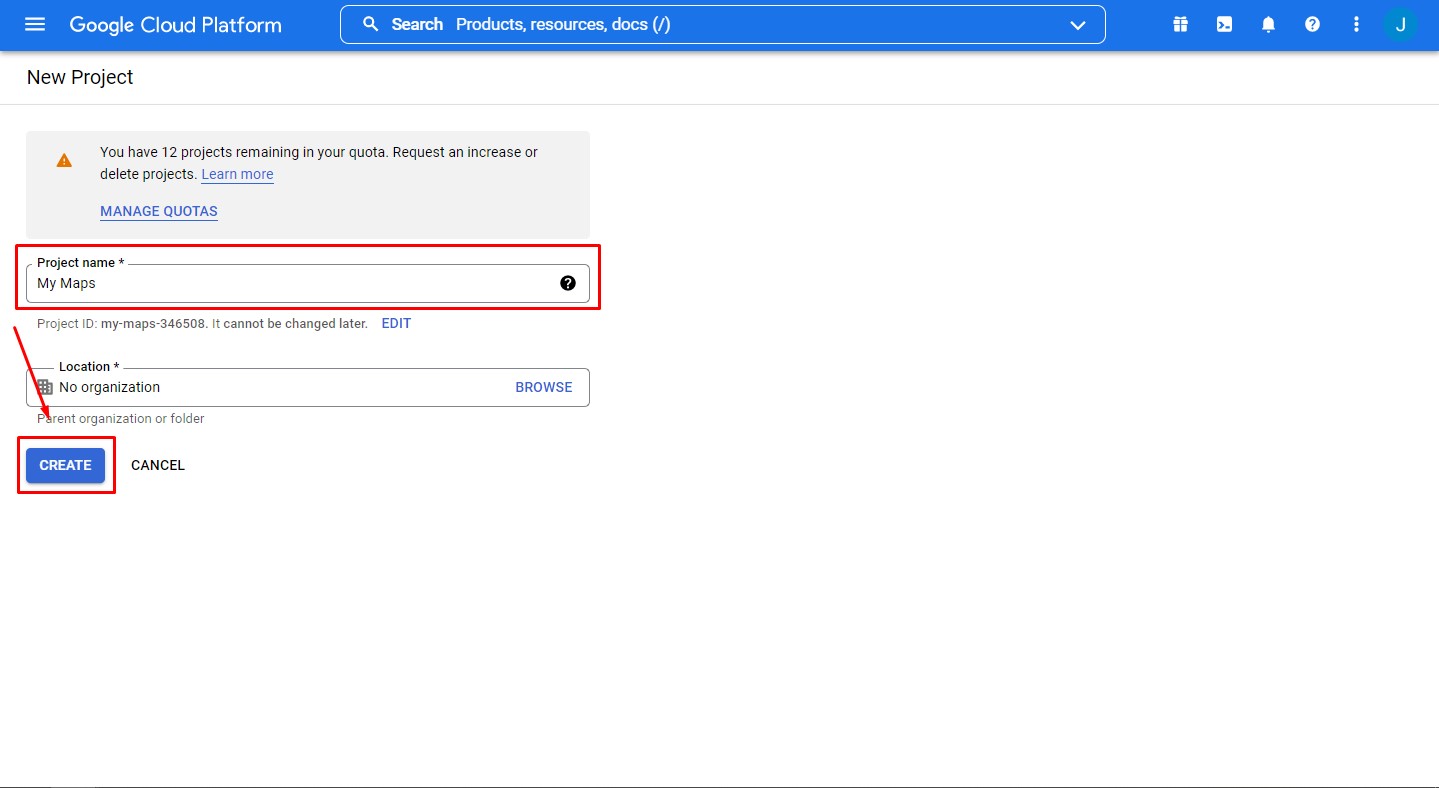
- Once you are done with account details and billing details, you will see create Project button, click on it and create new project as shown in below screen.
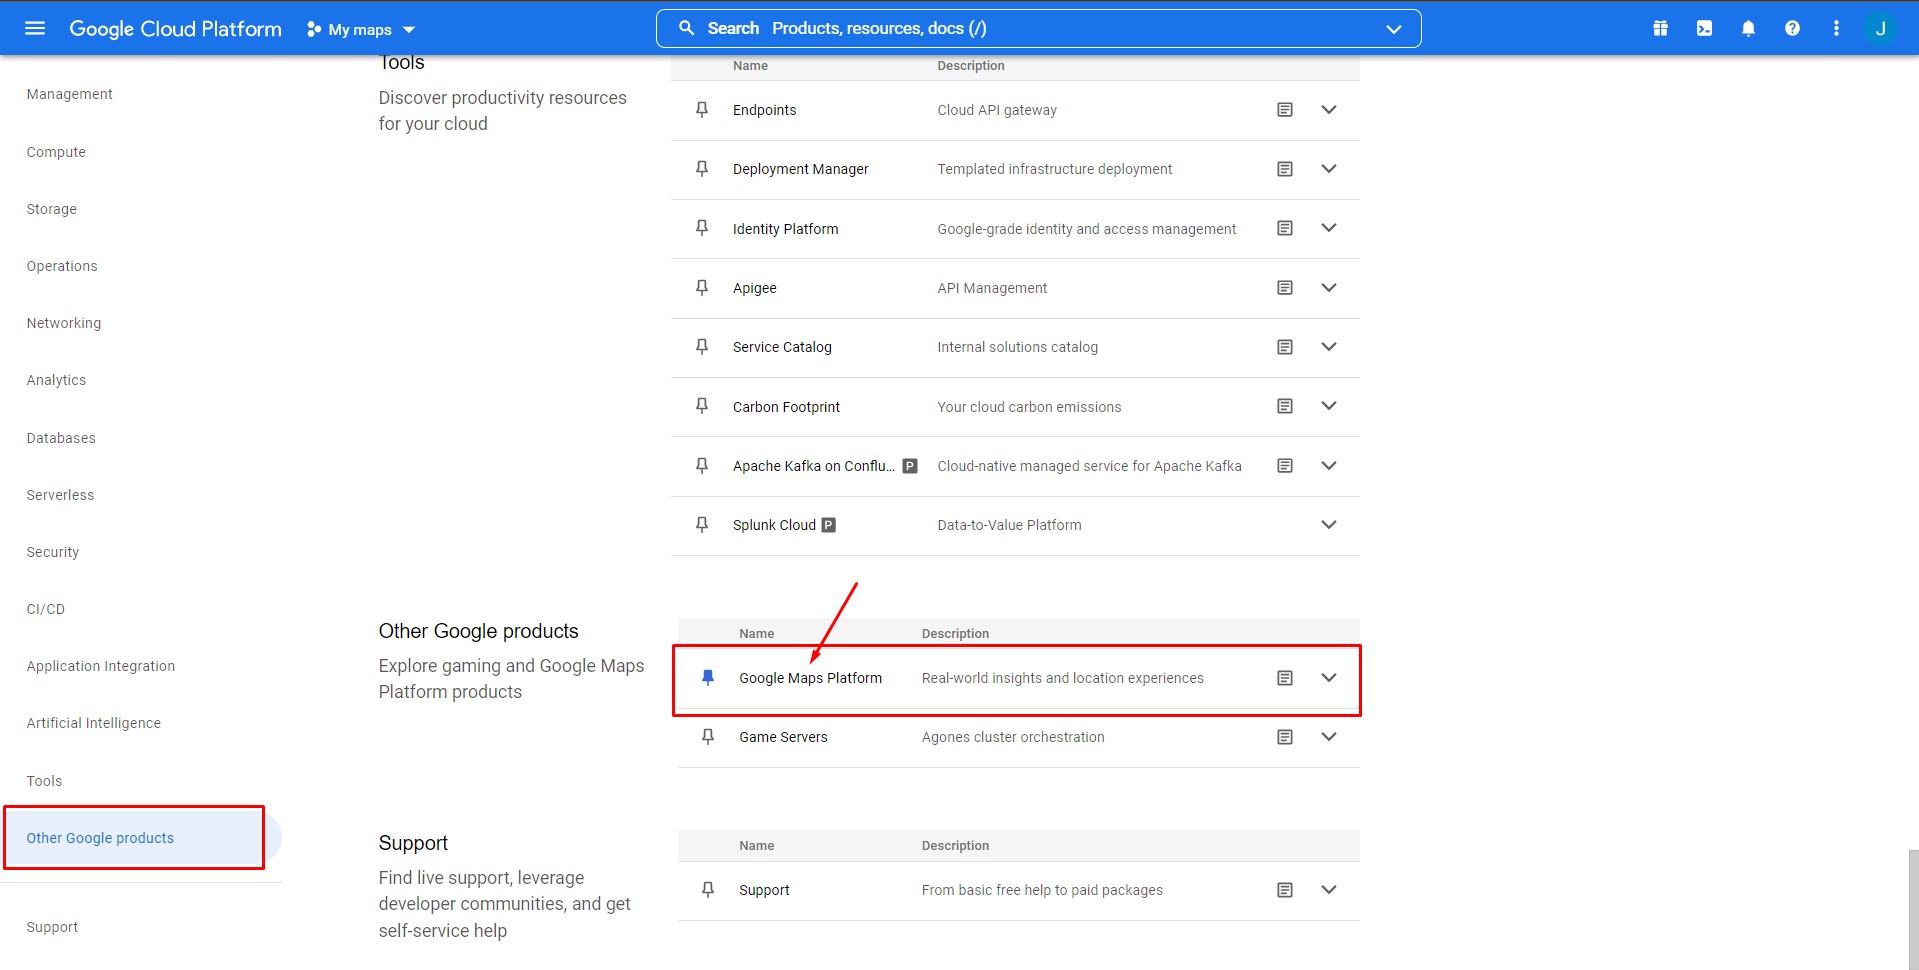
- After creating new project, Now click on view all products from side bar, it will show you all google produts now scroll down or select other google products and select google maps platform to start api configurations.
- Now you need to select Available APIs to use to display map in different purpose, for example Geo Locations API, Maps Javascript API
- In this documentation, we are going to use 2 or 3 APIs, which are Geocoding API, Maps JavaScript API, and Places API
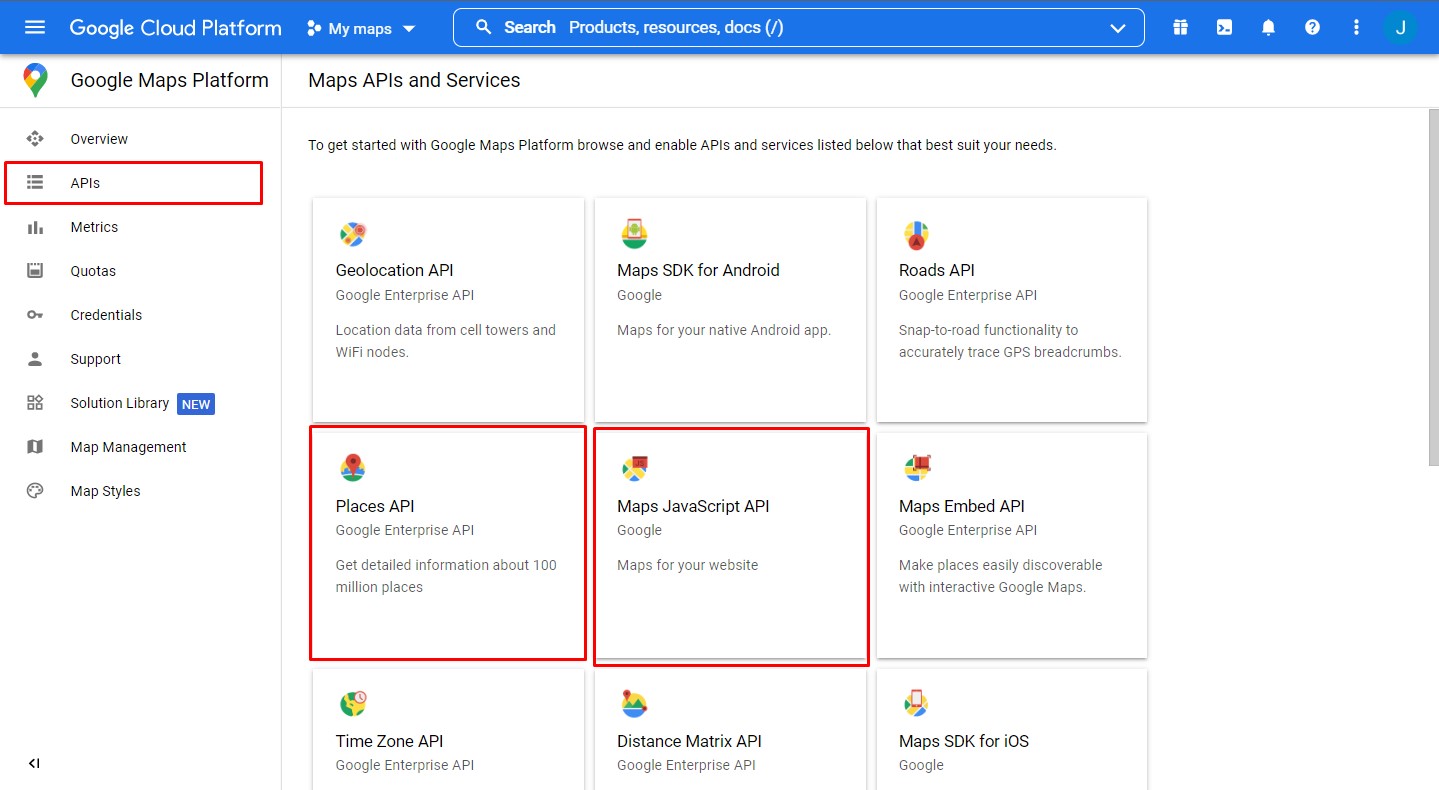
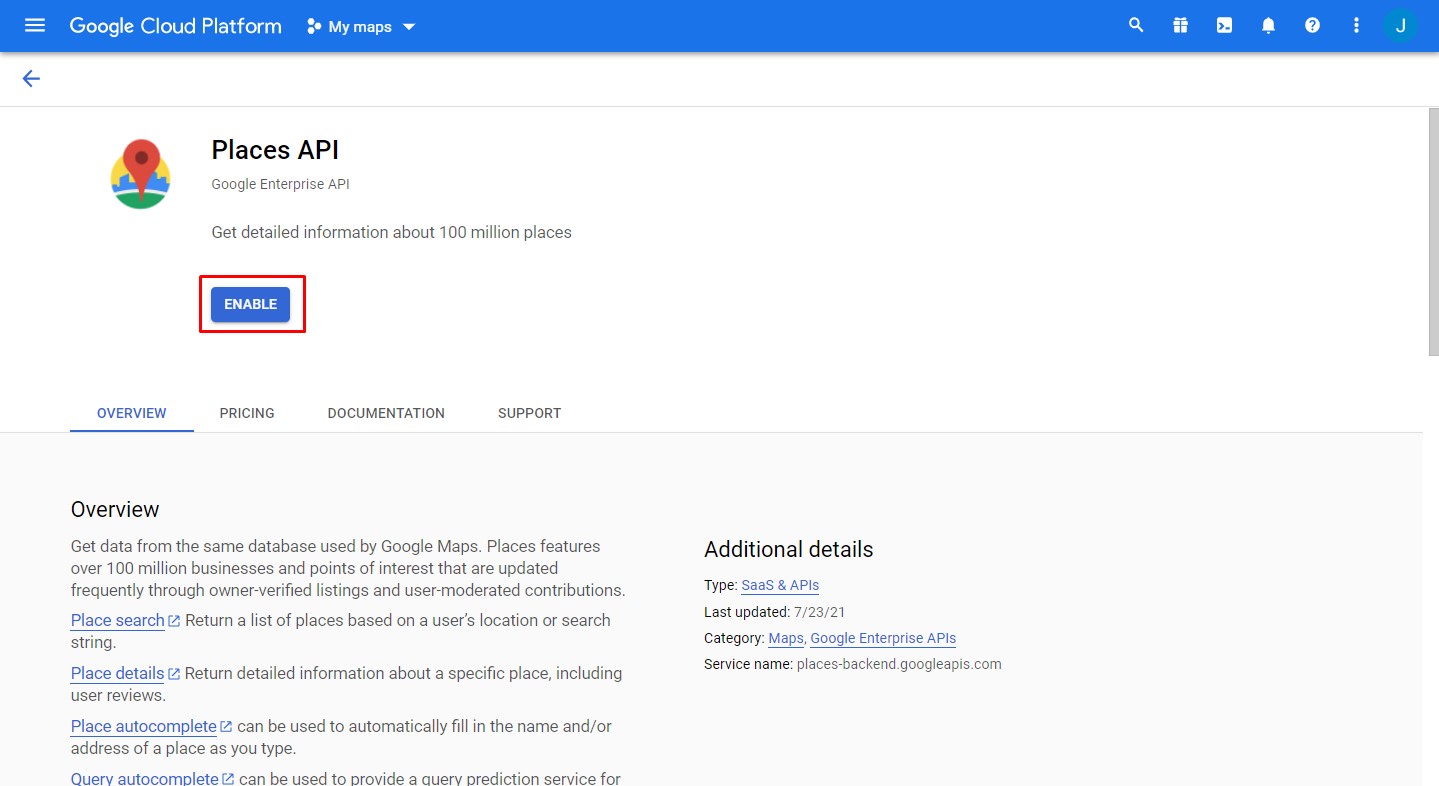
- Now you need to enable them one after other, For example click on Places API shown in below screen, and click on enable button. it will take few seconds and enables thePlaces API.
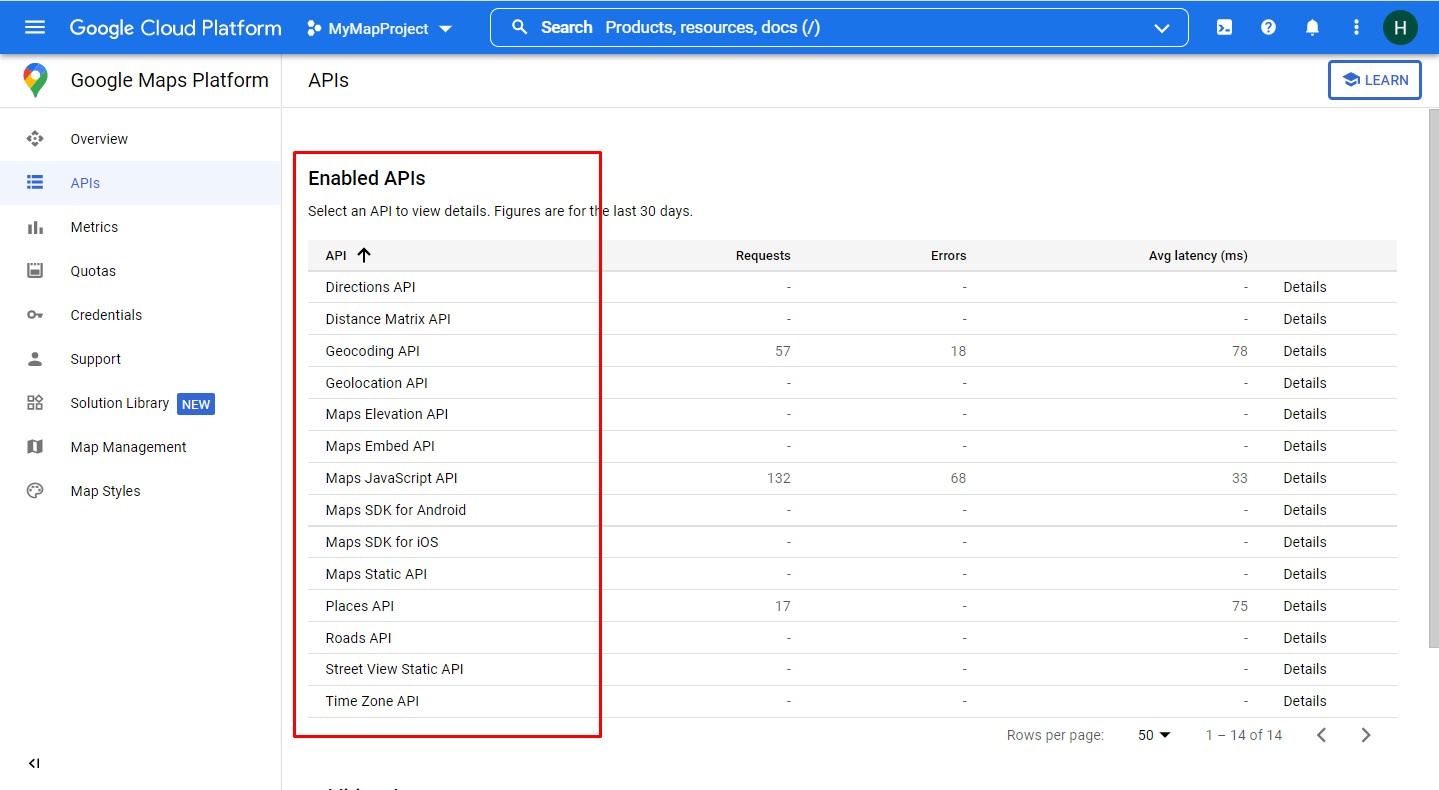
- Once you enables the required APIs, you will screen as shown below.
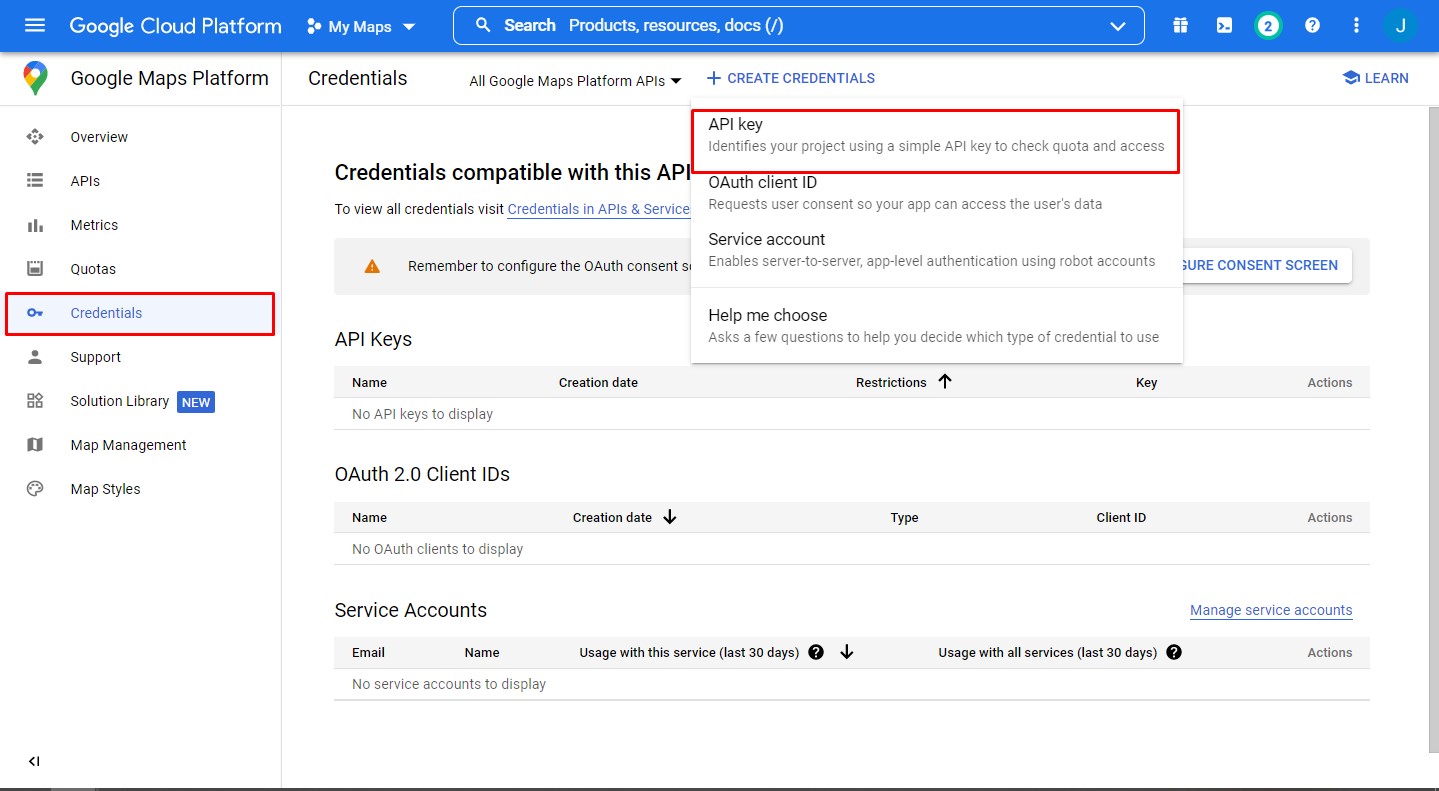
- Now create final step is to create API key for the selected APIs, now go to Credentials > click "create credentials" > select "API key", see below screen.
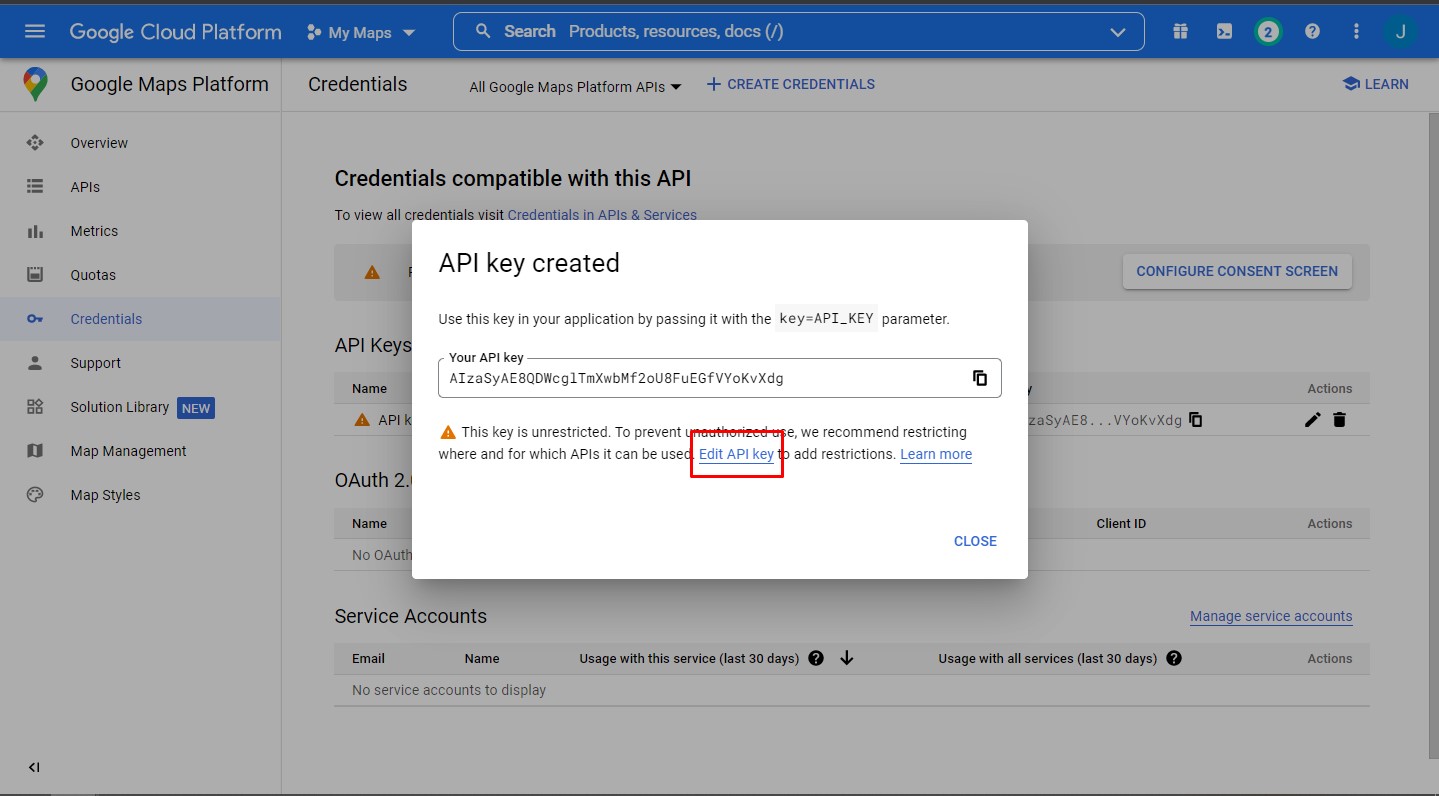
- You will see API key has been created, you can copy it and click on "Edit API" to add restrictions so that your API can not be used by any other.
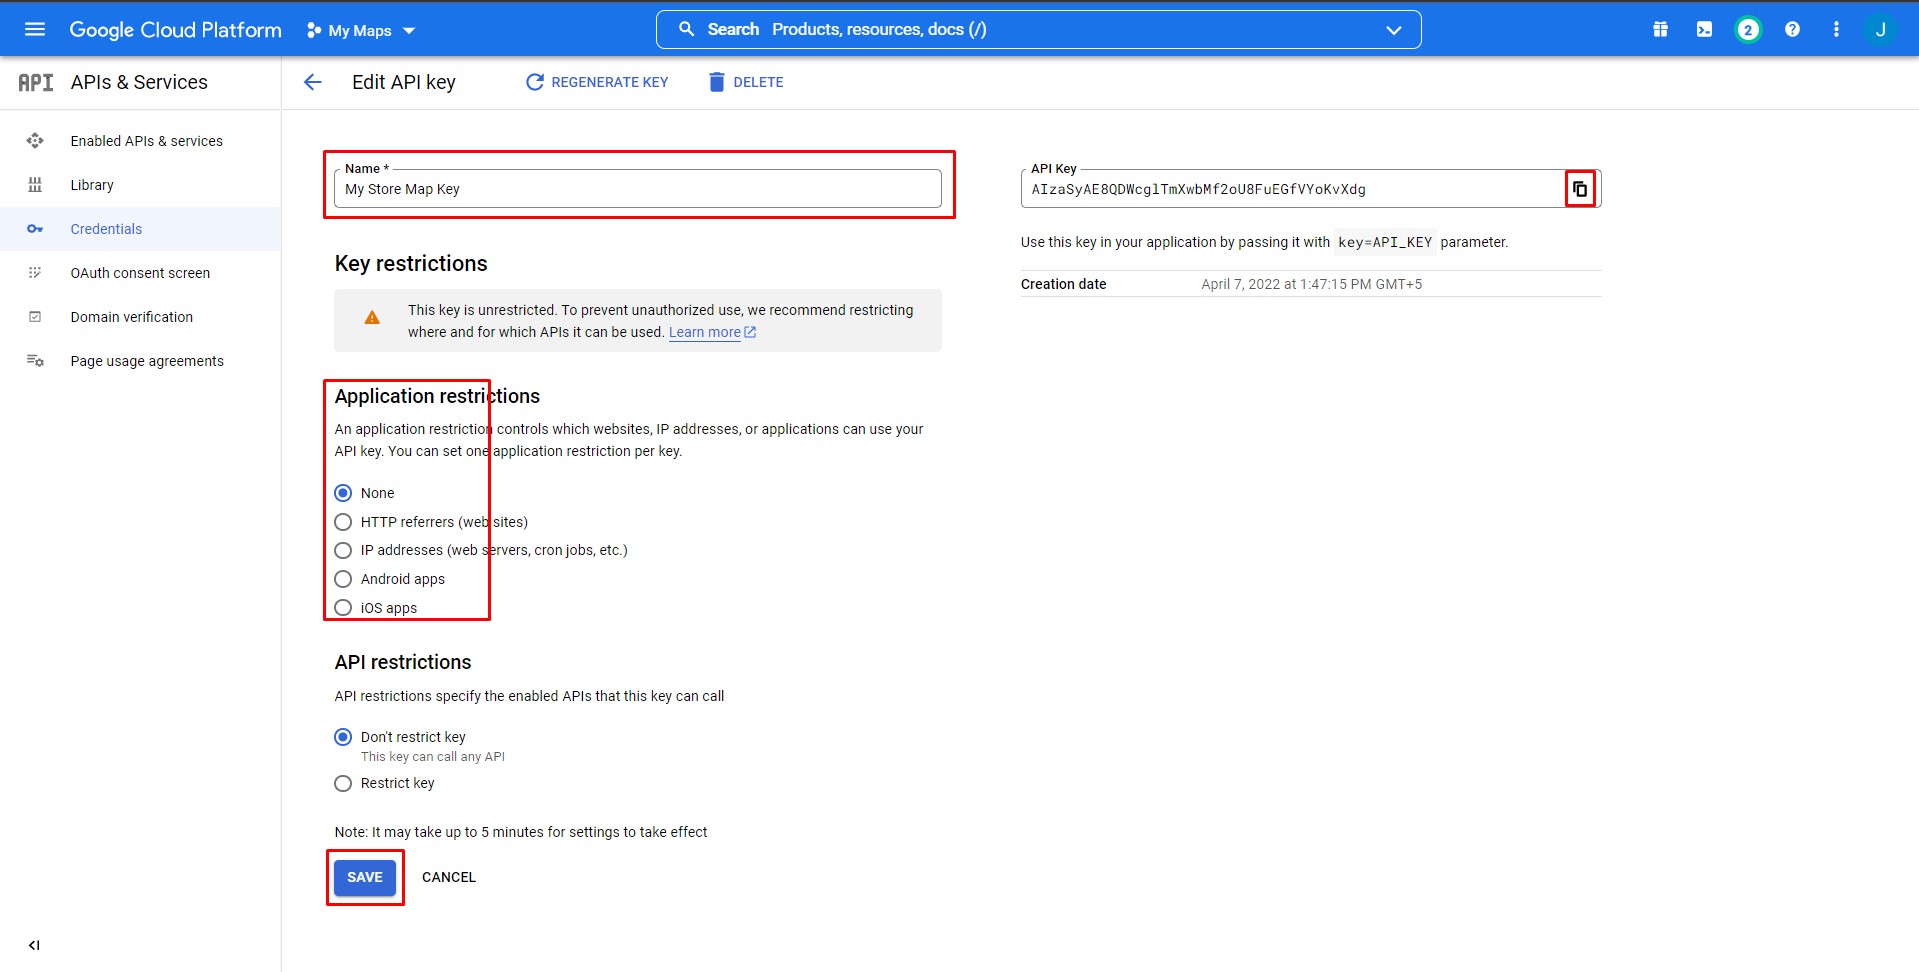
- For information, please read the description provided by google To restrict the API from unauthorised access and save the configurations, see below screen.
- Now you can copy the API key and paste it to module configuration, if everything is correctly configured, you will see google map on your store.
Thank You For purchasing.
Module has been successfully installed & configured
If you have any questions, please feel free to contact us via our support form just Create Ticket. Thanks again for your purchase.
you can contact us any time, we are available 24*7.