
At the very first step we must need running Opencart store on your domain. For that you must check Opencart installation compatibilities we have mentioned below.
-
Also To install the Opencart you must have Server space at a Hosting Server, Domain Name for your store, and mainly FTP Client to access your files, and File Editor. Or you can default file editors as well.
- Web server: Apache Web server 2.0 or later.
- PHP 7.1 or later.
- MySQL 5.1 or later.
- At least 1024 Mb of RAM on your server.
-
Or If you do are ready for live store install it on localhost server.
For more details information Opencart platform, you must visit opencart installation documentation at least once http://docs.opencart.com/en-gb/installation
-
At final step must ensure Opencart is installed correctly as well as check files permissions to access the files after that Follow below steps to install our module.
Let see how we can install the module step by step.
Take quick guide from our video tutorials, after that you can follow the steps below.
If you are failed to uploading or installing module at any step, Please feel free contact us any time using our support system Create Ticket.
At very first step login to FTP server and connect it via any cross-platform FTP applications(ie. FileZila or Cute FTP). In this documentation we are using File Zilla FTP Application software.
Note : Before uploading the modules files to your server, we need to make module compatible to current theme of your opencart store. For that we need to find active theme on your opencart store. Follow steps to know current theme name.

1. Goto \Module Files\catalog\view\theme on file server of opencart store.
2. Rename "Default" folder name to your current theme(ie. fashionstore). we are taking name for example in documentation.
3. Now the module is compatible with your current theme.
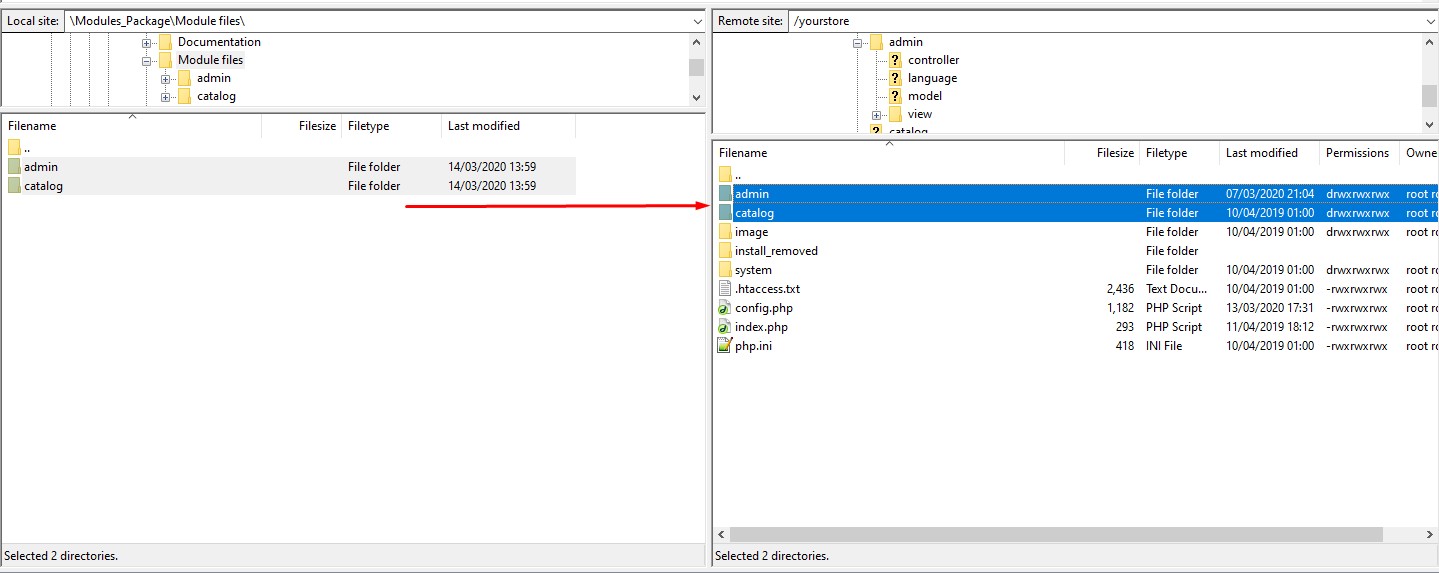
After that goto to the path ROOT directory in opencart store installation(ie. /yourstore). As below screen.
Simple COPY/OVERWRITE module directories and files to the path mentioned above and follow the screen.
First of all login to your store back office using correct credentials and follow the step.
Back office > Extensions > Extensions > Modules(select from drop down) as shown in below screen.
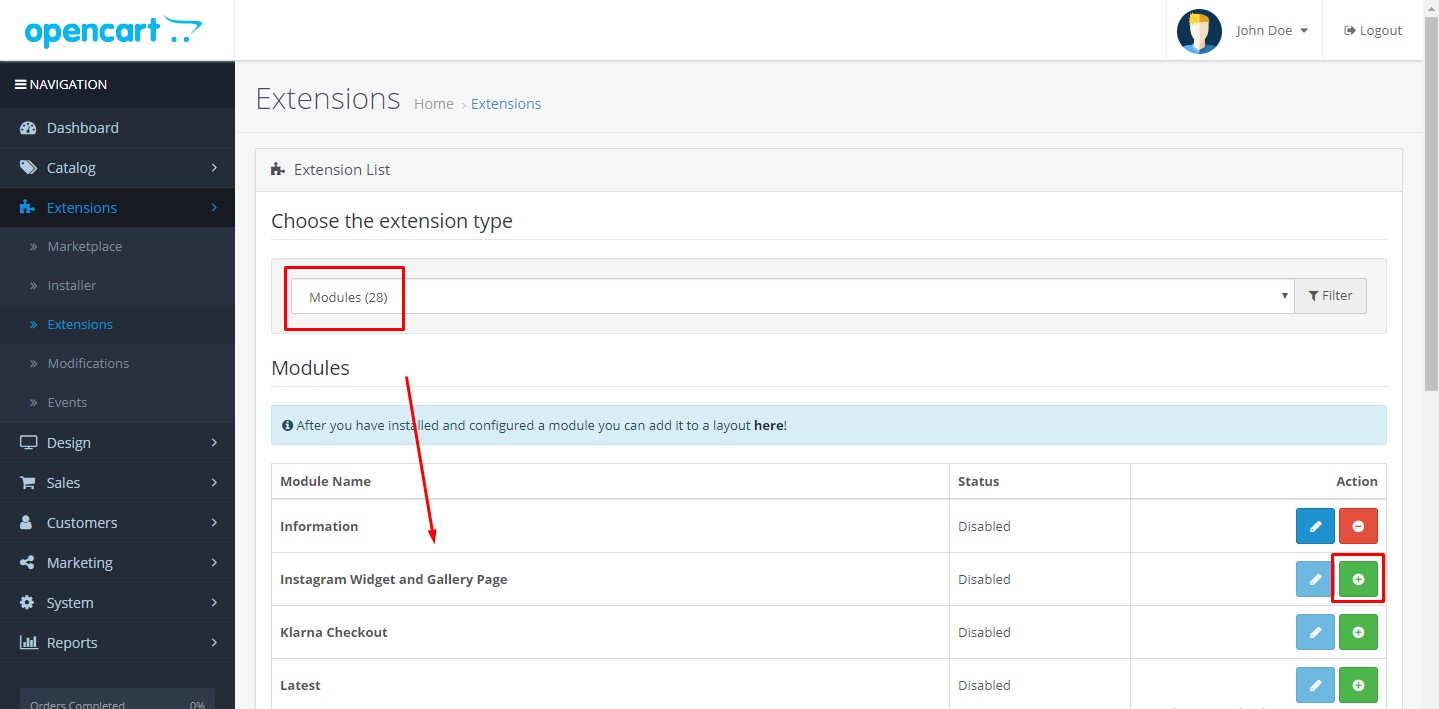
Click on Install Button after that module installation will be automatically started. Please wait for successful message.
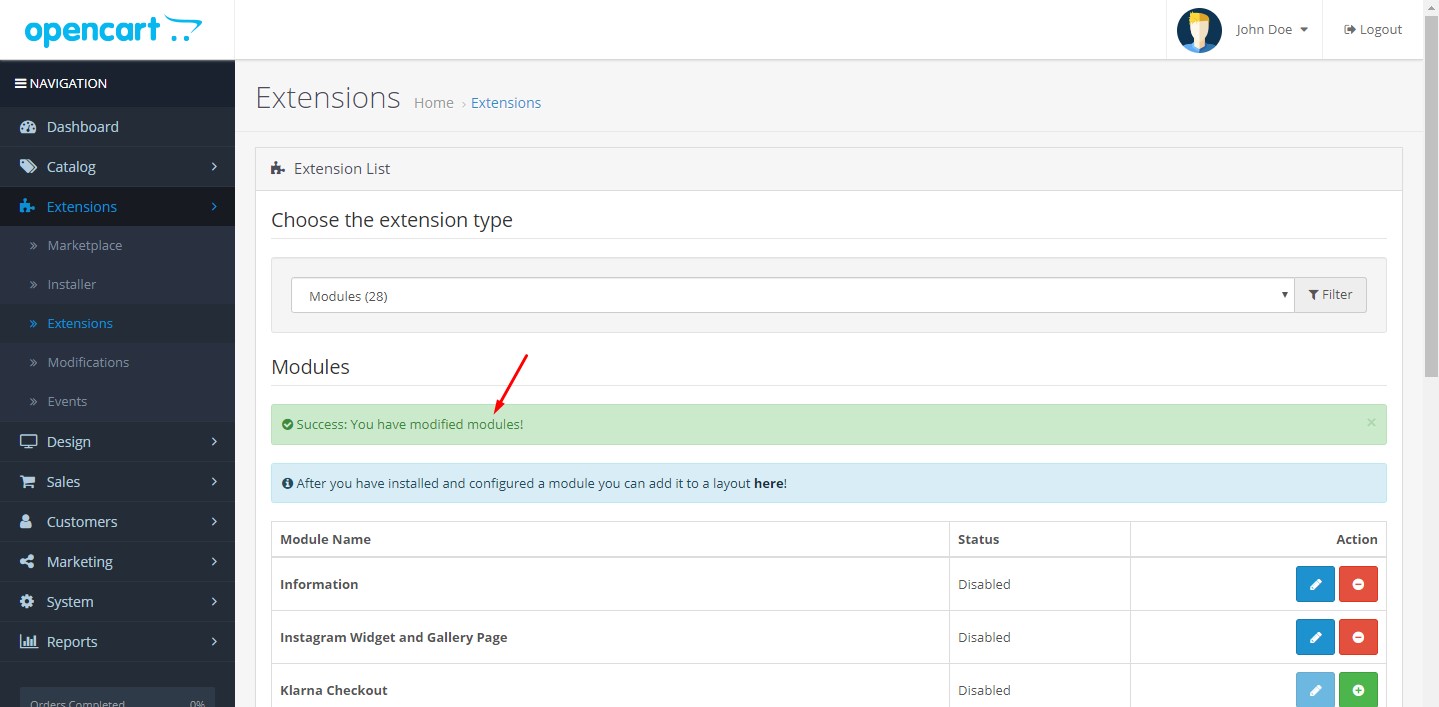
If module installation displays success message, Please click on Configure Button.
As mentioned in above steps after successful installation of module, Let configure the module. with two different module positions for Home Page and Gallery Page as below.
Take quick guide from our video tutorials, after that you can follow the steps below.
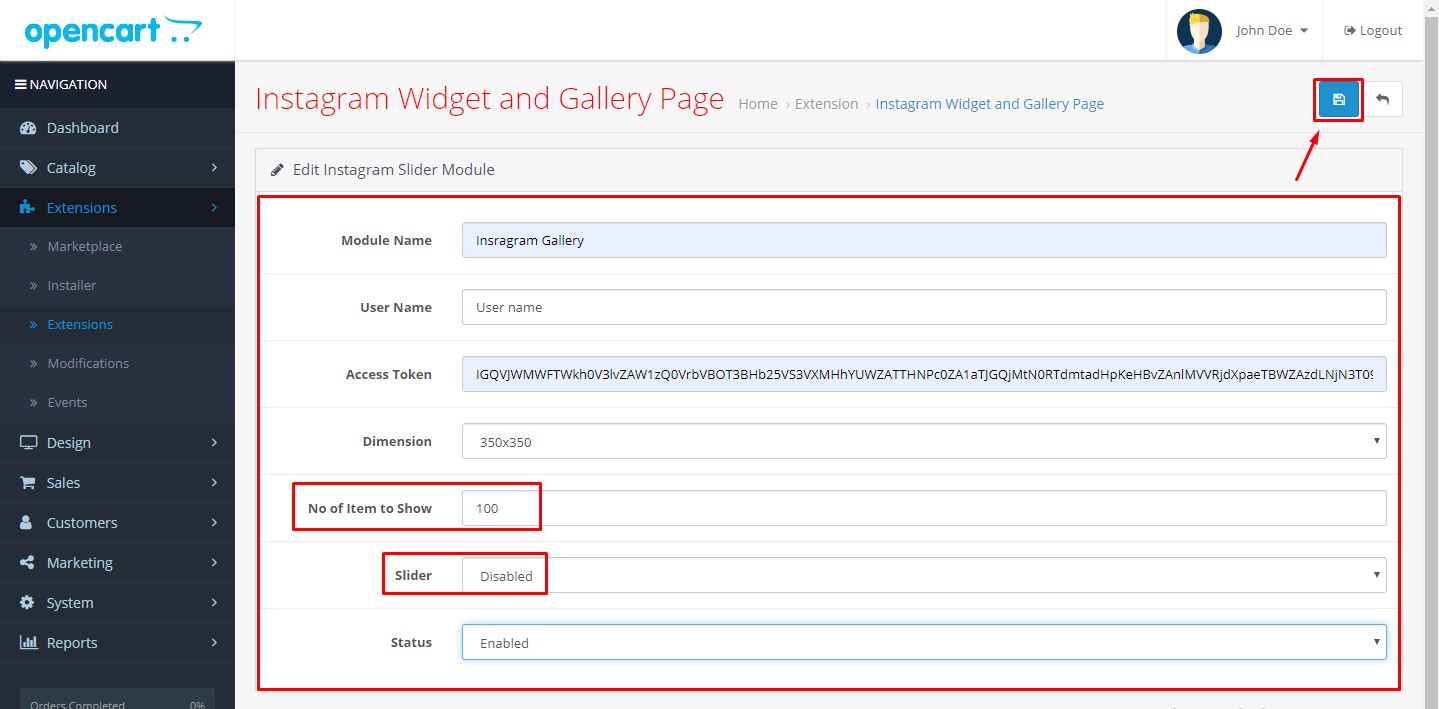
To creating a Home widget at store home page, you need to create proper settings let discuss in details click on Edit button shown in below screen.

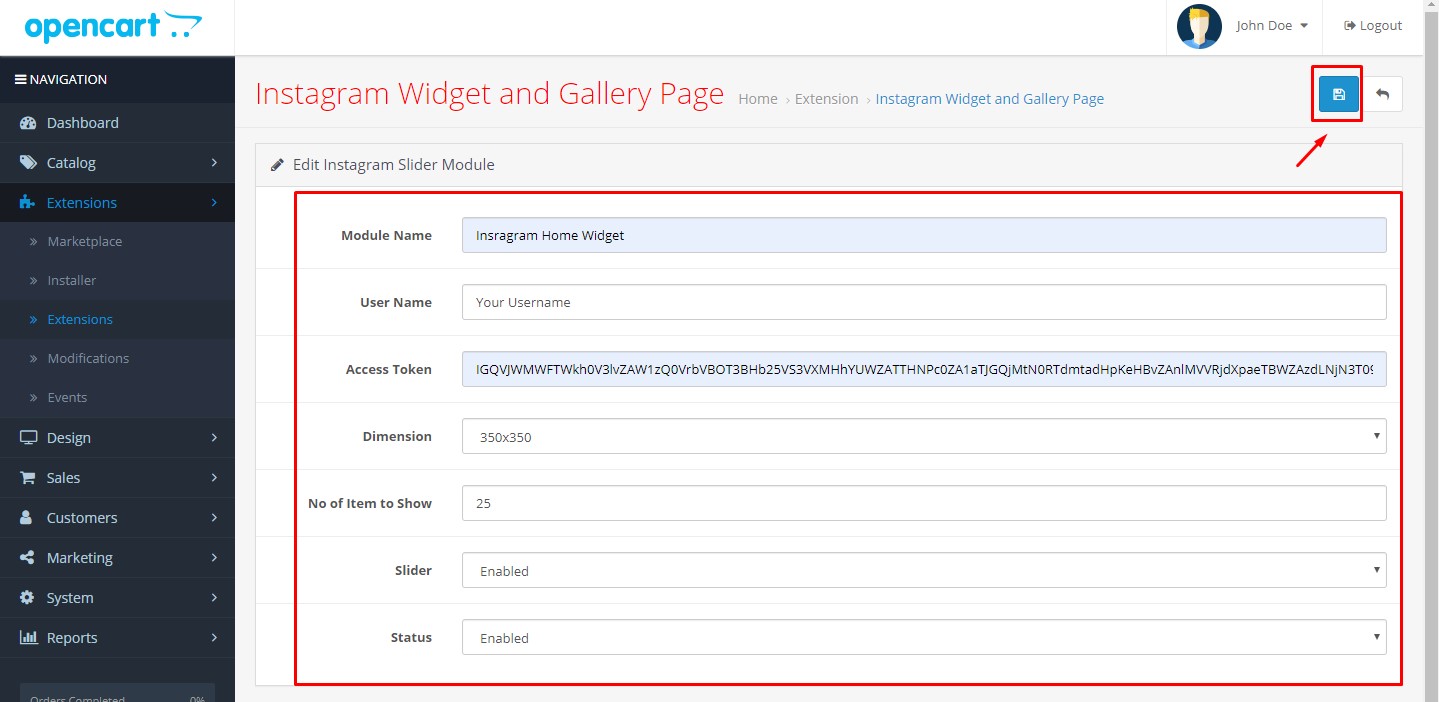
Edit button will opens form which contains the fields as show in below screen.
Before creating settings you need some details as below.
-
Module Name : Take the name which provide proper meaning to modules settings, Later on it will be used. we are taking as Instgram Home Widget.
-
User Name : Give a user name that matches your domain which goes to Follow @ < username >
-
Access Token : One of the most important field, you need access tokens for module to access your instagram photos will display on your store.
-
No. of items to show : Numbers photos that will be fetched and display to the home widget.
-
Slider : Module offer the photo to display as Grid or Slider, Sider will be the best option.
-
Status : Do not forget to change status of module, Select Enable from the drop down
click on save button shown in the above screen.
Take quick guide from our video tutorials, after that you can follow the steps below.
For infinite Gallery page some of settings will be change please see beow.
-
No. of items to show : Numbers photos that will be fetched. for infinite loading it must be more that 25.. as instagram respond with 25 photos per request. For Gallery you will need multiple requests.
-
Slider : Disable slider for gallery page as it will by default grid view with infinite loading button.
-
Status : Again do not forget to change status of module, Select Enable from the drop down
Take quick guide from our video tutorials, after that you can follow the steps below.
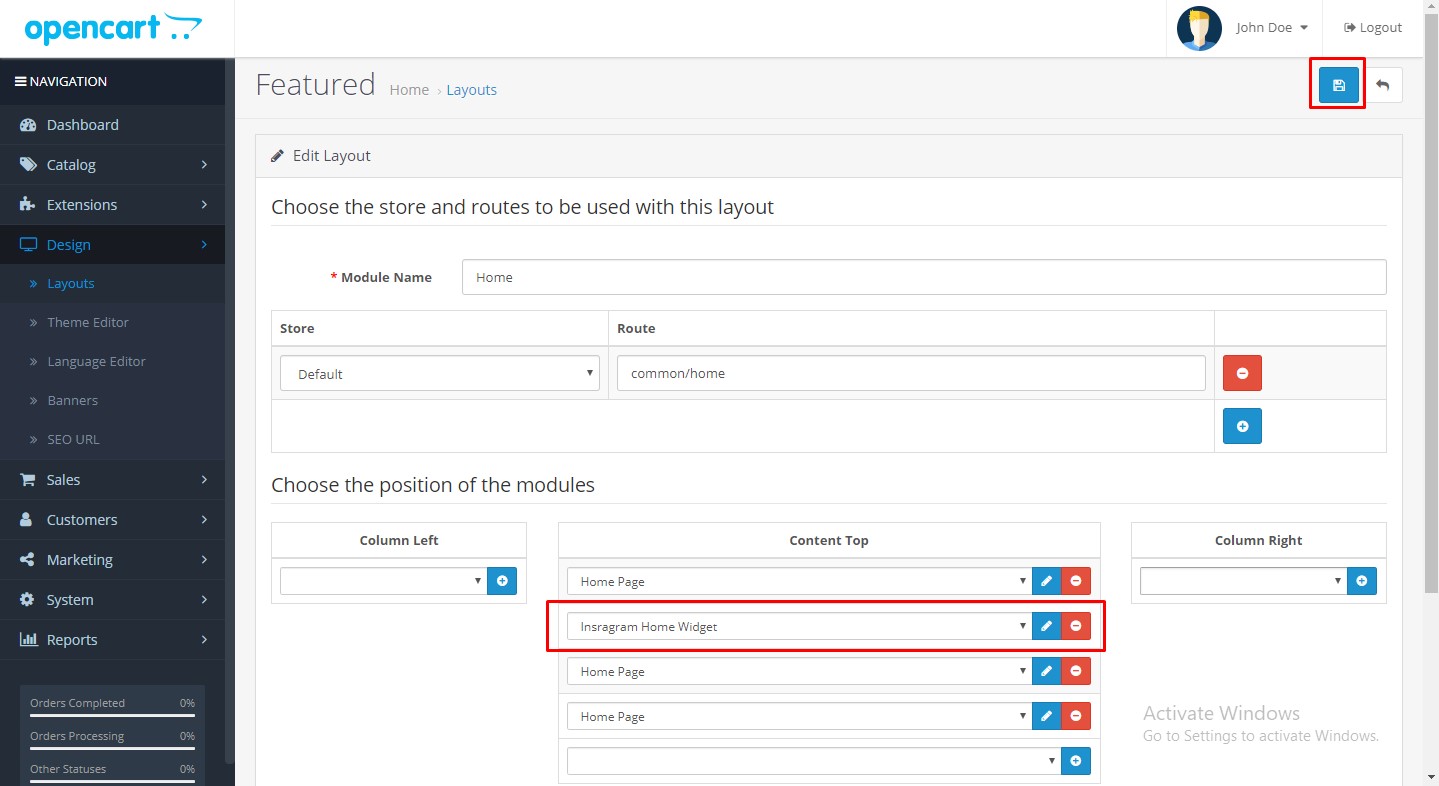
After Module has been successfully installed & configured, Modify the your theme layouts, as we have two module configurations created we need to give some positions on layouts to those configurations.
Go to backoffice > Design > Layouts. Edit Home layout as shown in below screen.

Now click on Edit button, It will opens new screen, Follow the screen below.
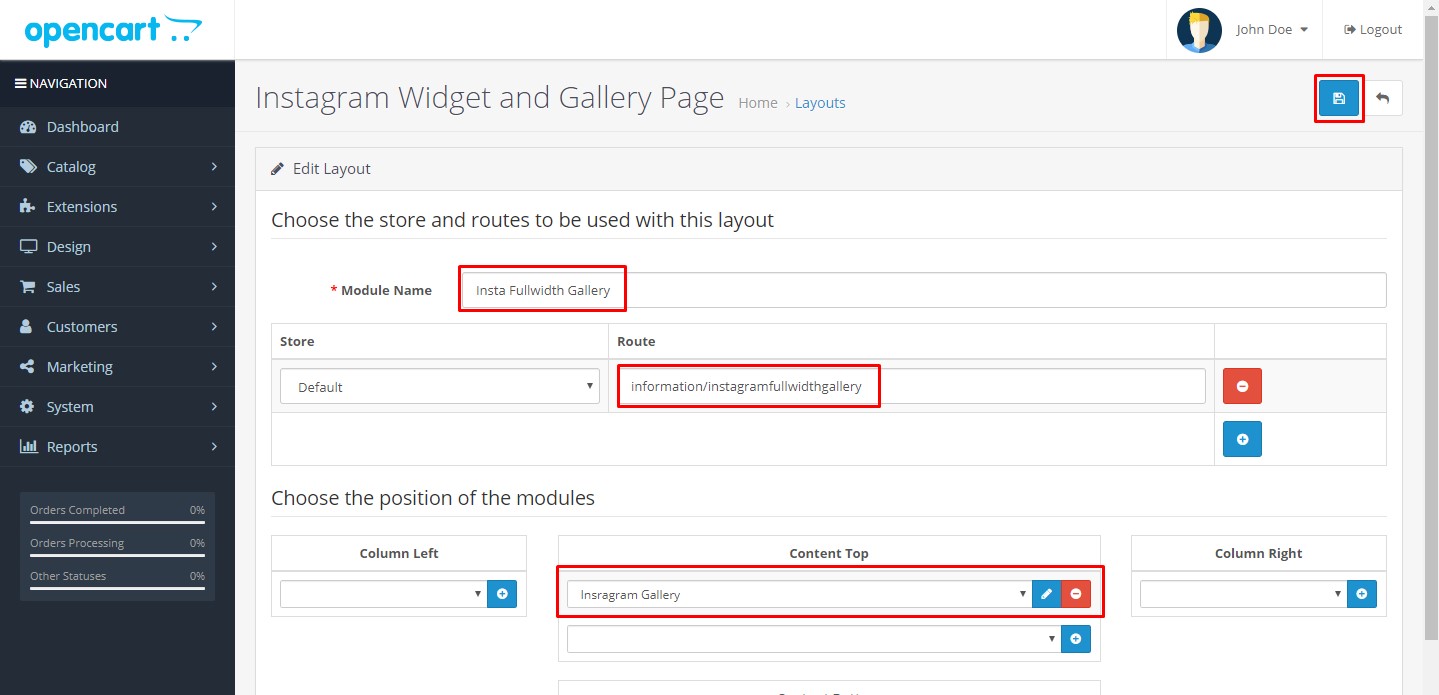
For Gallery layout we must need to create new layout which will be used to display instagram photo gallery.
Go to backoffice > Design > Layouts, and click on Add new Button at upper right corner. and follow the screen below
-
Layout name : Give meaningful layout name and fill other details. we are using Insta full width Gallery
-
Route : Simple copy below text which will be the route for gallery page.
Full width : information/instagramfullwidthgallery
Left column : information/instagramleftcolumngallery
Right column : information/instagramrightcolumngallery
Both columns : information/instagrambothcolumngallery -
Content top : content top is the position where the module will display its output on the layout, content Top and bottom can be used for page content.
Watch a video OR Follow steps below
-
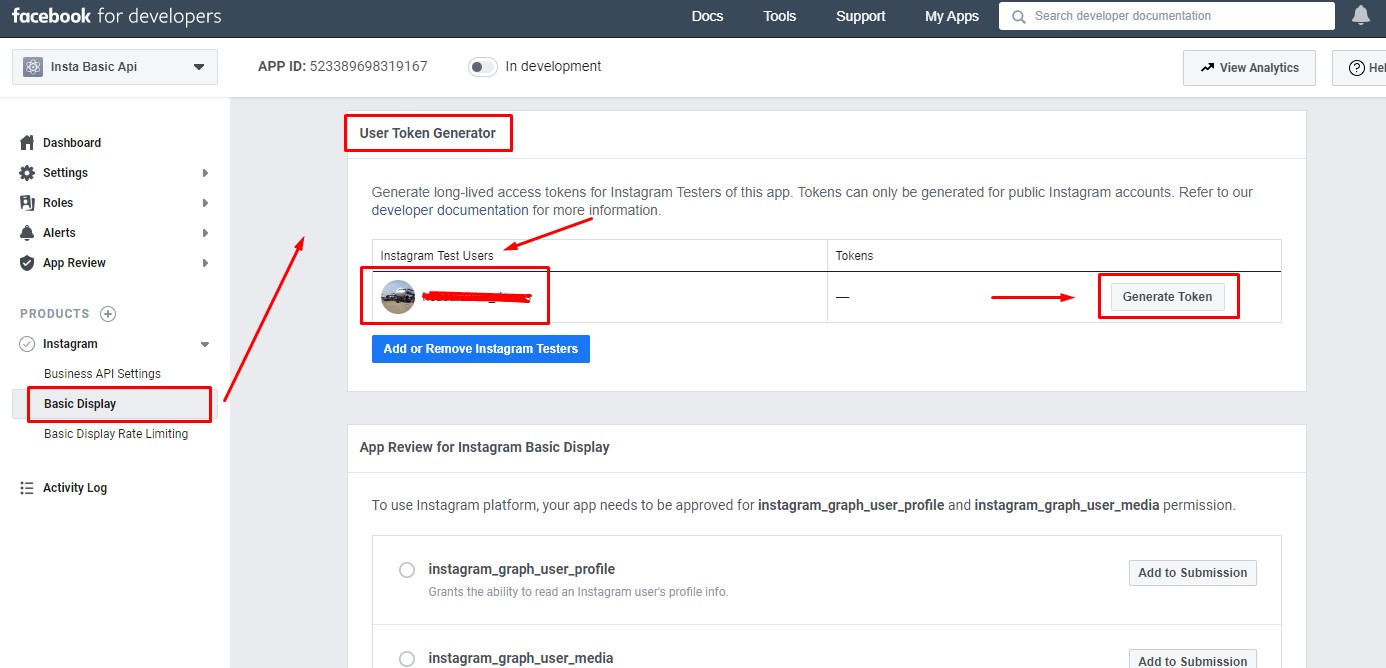
1. First of all visit the face book docs to Create instgram app and test user authorization with face book developer account.
- 2. Once successfully create an app and authorized the user. Go to Face book Developer Dashboard > Products > Instgram > Basic Display.
- Click on Generate Token shown in below screen.
-
3. It ask for login and login with instagram user , It is same user created as instagram test user in face book developer docs and click on continue.
4. Another popup open with the access token. as below
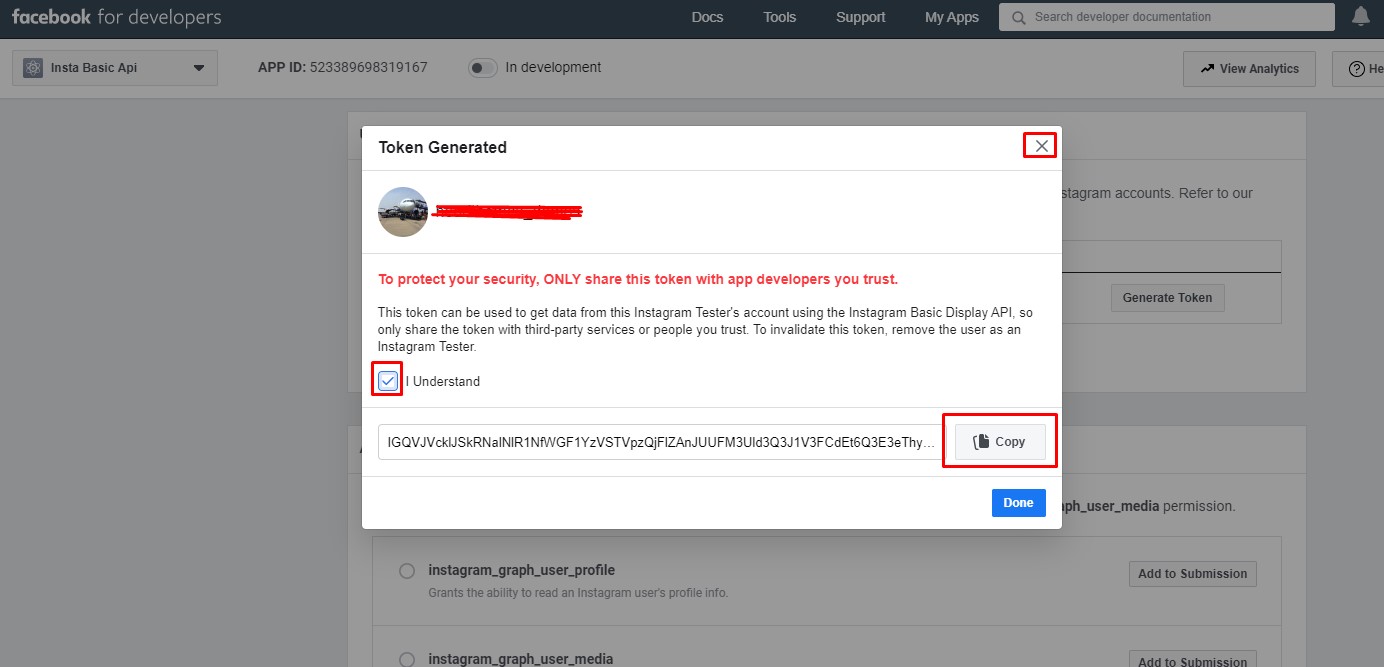
5. Finally, access token is created Copy access token to module configurations.
Thank You For purchasing.
Module has been successfully installed & configured
If you have any questions, please feel free to contact us via our support form just Create Ticket. Thanks again for your purchase.
you can contact us any time, we are available 24*7.